Jun
How to Measure a Window for Glass Replacement is a crucial skill, whether you’re tackling a DIY repair or ordering a custom pane from a professional supplier. Accurate measurements ensure the new glass fits securely and performs as it should—restoring both function and appearance.
In this guide, we’ll walk you through the step-by-step process of measuring windows for glass replacement, with practical tips for aluminium, wooden, and steel frames.
Why Accurate Window Measurements Matter
Incorrect measurements can lead to:
- Loose glass panels that rattle or leak
- Costly reorders due to wrong glass sizes
- Poor insulation and energy efficiency
- Delays in repair and installation
By following the right method, you’ll avoid frustration and ensure your glass replacement fits perfectly the first time.
Tools You’ll Need
To measure your window properly, gather the following:
- Measuring tape (preferably steel)
- Notepad or phone to record sizes
- Pen or marker
- Protective gloves (especially if the window is broken)
- Flat-head screwdriver (for removing glazing beads if needed)
Step-by-Step: How to Measure a Window for Glass Replacement
Step 1: Identify the Frame Type
Different frame materials require slightly different approaches:
- Aluminium windows usually have glazing beads that can be removed
- Wooden frames may use putty or beaded strips
- Steel windows often use fixed frame systems with putty
Understanding the frame type helps you decide if you should measure visible glass or the full rebate.
Step 2: Remove the Glass or Glazing Beads (If Possible)
For more accurate measurements:
- Carefully remove the glazing beads or broken glass.
- This allows you to measure the actual glass size, not just the visible portion.
If the glass is still intact and you’re not removing it, measure only the visible area and add approximately 10mm to each dimension for allowance.
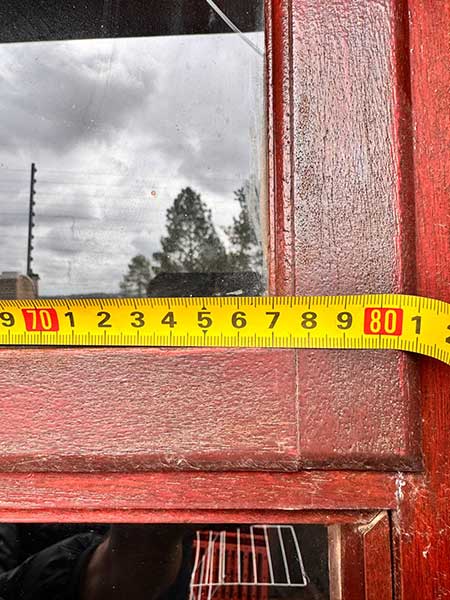
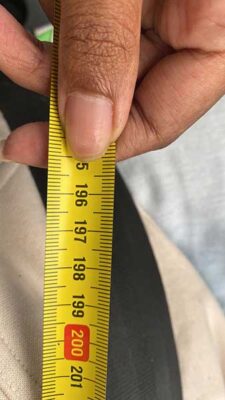
Step 3: Take Measurements
Measure:
- Width (from left to right inside the frame)
- Height (from top to bottom inside the frame)
- Depth (the thickness of the frame or old glass)
Take three measurements across both width and height—top, middle, and bottom—to account for any variations. Record the smallest measurement in each direction.
📌 Pro Tip: Measure in millimetres (mm) – the standard unit used by glass suppliers in South Africa and internationally.
Step 4: Account for Glass Thickness
Check the glass thickness:
- Standard float glass is 4mm
- Safety glass or double-glazing may range from 6mm to 24mm
Use a caliper or estimate based on the existing pane. This is crucial when ordering replacements like laminated safety glass or tempered glass.
Step 5: Double-Check and Label
Before placing an order:
- Recheck all measurements
- Label each glass pane by location (e.g., “kitchen window left side”)
- Note any special glass type needed (e.g., frosted, tinted, or low-E)
Common Mistakes to Avoid
- Measuring only the visible glass without adding allowance
- Not checking for warped frames or out-of-square openings
- Assuming all windows in a room are the same size
- Forgetting to measure glass thickness
Final Thoughts
Learning how to measure for window glass replacement correctly saves you time, money, and headaches. Whether you’re doing a DIY glass repair or handing the specs to a glazier, accuracy is key.
For professional results and same-day service in areas like Sandton, Johannesburg, or Pretoria, consider working with a trusted glass replacement company.